Enterprise SSO implementation guide
Prerequisites
The following prerequisites must be met before you can configure SSO:
- Your organization has ordered SSO.
- Your Identity Provider (IdP) must support the OpenID Connect (OIDC) protocol and support the authorization code flow.
- Each user must have at least the following claims: given_name, family_name, email.
Configuration
Currently, the setup requires manual work so we will require some information from you and we will then also give you the appropriate URLs for you to configure. The URLs will be the sign-in and sign-out URLs that the user will be redirected to where the login/logout process will be finalized.
These URLs will be in the form of https://auth.cm.com/federation/[SomeValue]/signin and https://auth.cm.com/federation/[SomeValue]/signout.
We will also need a list of (verified) domains that your users will authenticate with (such as example.com & example.org) and a list of users that you wish to test with and/or exclude from using the SSO implementation. Additionally, we can configure new SSO users to get default roles for an account if needed i.e. every new user gains the User role for one of your accounts.
Afterwards, you must create a client in your IdP for us to use. This will differ between each IdP implementation (Azure AD, Okta or others) so make sure you read the appropriate documentation for your specific IdP.
For us to set up the redirect to your IdP we will require the authority URL, a client ID and a client secret so that we can configure our login system as a client of your IdP. Our login system will use the authorization code flow so make sure the client configuration supports that.
After having configured the client, we can begin testing the implementation by allowing specific users to use the SSO implementation. If the implementation works as expected we will allow the rest of the users to login via your IdP and the implementation will be complete.
Example: Azure AD
Go to the Azure AD configuration page on the Azure portal. On the configuration page, go to "App registrations" and press "New Registration". Fill in a name and configure the supported account types that you want our system to be able to authenticate with. Click "Register" and open the newly created application.
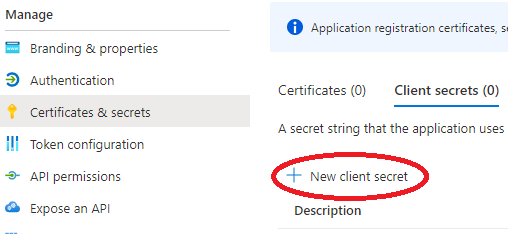
Go to "Certificates & Secrets" and create a new client secret with a minimum expiry time of 6 months (180 days). Make sure to save the value as you won't be able to see it after leaving the page.

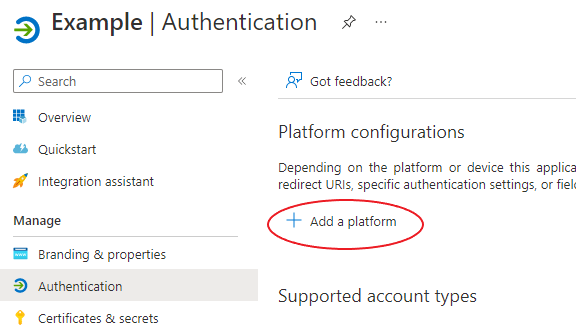
Go to the "Authentication" tab -> Press "Add a platform" -> Choose "Web"

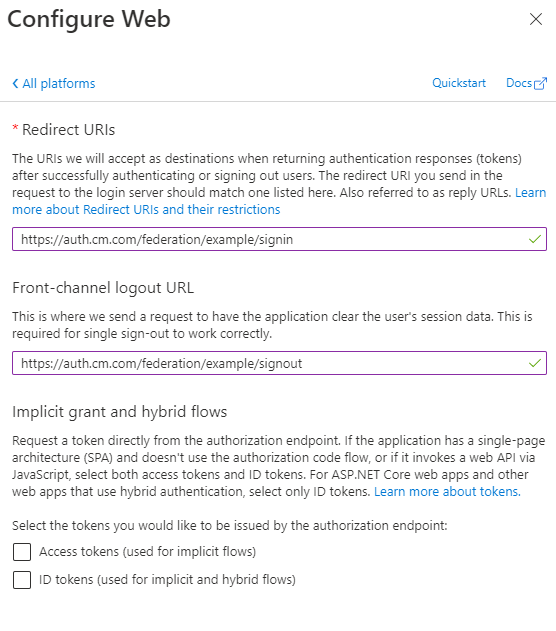
Use the URLs we have given you to configure the sign-in & sign-out URLs and make sure that the "Access tokens" and "ID tokens" checkboxes are left unchecked.

Go back to the overview page.

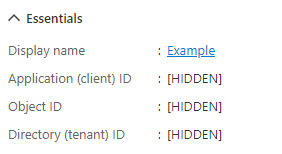
The IDs under the "Essentials" are what we need to configure your IdP, specifically the tenant ID and client ID. The tenant ID is used for the authority URL which for Azure AD will be in the form of https://login.microsoftonline.com/{tenantID}/v2.0.
After having setup the client, send us the authority URL, Client ID and the value of the created secret.